How To Request New Tags (OPC Connector)
Create a New Data Request
-
Create a Data Request
-
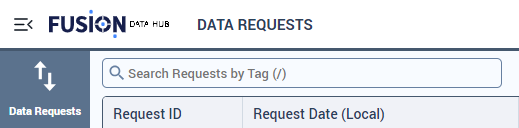
Navigate to the data request page.
-
Select “CREATE NEW REQUEST”

-
Click on the newly generated Request ID number.

-
Utilize the following options for adding new tags:

- Click “ADD TAGS” to manually select or search for tags.
- Click “IMPORT FROM LIST” to import tags from a CSV or list.
-
Select the Request Type:

Start Scanis used for normal streaming/history requests.Gap Fillworks like a historical request and is recommended when you want to backfill missing data for a specific time range.Gap Fillchecks data before insertion so existing points are not duplicated.
-
Set the History Start Time:

- Choosing no start time will capture all historical data.
- The entered start time is based on your local computer time and will be converted to UTC upon request submission.
-
Set the History End Time:

- Choosing no end time will configure the request to stream live data.
- The entered end time is based on your local computer time and will be converted to UTC upon request submission.
-
Click “SAVE AS DRAFT”.

-
-
Navigate to the Tag Controller Swagger page “tagcontrollerurl/api/swagger/ui”
-
Expand the Get for
'/HistoryUploadRequest/{HistoryUploadRequest}/TagConfiguration', click “Try it out” and fill in Id with the request id from step 1
-
Download the file that was created.
-
Using the provided sample CSV file, fill out the document with the TSID’s and update Dead Banding Type/Value and Sample Rate (sample rate in ms, Dead Band Value is a decimal).
-
In
/HistoryUploadRequest/{HistoryUploadRequest}/TagConfiguration, input the Request Id and upload the CSV file.
-
Return to the Data Request page and submit the request.